Now we come to the issue. If I successfully get to Masters what do I add to Gaspy3 and Denny1? I'm really happy with both those lists so what supports them?
Gaspy2 is a powerhouse and Tartarus is available, but I haven't used him in ages.
Lich Lord Asphyxious (2)
- Helldiver
- Nightwretch
- Ripjaw
Bane Knights (max)
Bane Thralls (min)
- Officer & Standard
Bile Thralls (min)
Satyxis Blood Witches (min)
- Satyxis Bloog Hag
Bane Lord Tartarus
Gorman Di Wulfe
Madelyn Corbeau
Pistol Wraith
Saxon Orrik
Warwitch Siren
Goreshade2 is a slightly dark horse caster and the Kraken threatens those squishy casters like the Haleys. But I'll have very little pathfinder so will have to watch out for the tables.
Goreshade the Cursed (2)
- Kraken
- Skarlock Thrall
Bane Knights (max)
Bane Thralls (max)
- Officer & Standard
Bane Thralls (min)
- Officer & Standard
Bane Lord Tartarus
Necrotech & Scrap Thrall
Scrap Thralls x3
Skarre1 is great and in the last 6 months I haven't lost a tournament game with her. (Iron Grudge is an amazing app). But I'm starting to wonder about switching her out for something else.
Pirate Queen Skarre (1)
- Kraken
- Skarlock Thrall
Bane Knights (max) x2
Necrosurgeon
Bane Lord Tartarus
Darragh Wrathe
Machine Wraith
Necrotech x2
Satyxis Raider Captain
Finally there's Deneghra2 with her theme list. Because of the Mechanithrall engine it's very similar to my two major lists but with her spells out at the beginning of the game it plays very differently. I've played it a few times now, so can I rely on it in a Masters event?
Wraith Witch Deneghra (2)
- Nightwretch x2
- Nightmare
- Skarlock Thrall
Cephalyx Mind Slaver & Drudges (min) x2
Cephalyx Mind Slaver & Drudges (max)
Cephalyx Overlords x2
Mechanithralls (min)
- Brute Thralls x3
Mechanithralls (min)
Necrosurgeon x2
Warwitch Siren x2
Ragman
I've scheduled this for publication on Sunday lunch time. Follow my Twitter to see updates about how I do throughout the weekend.
Sunday 23 February 2014
Friday 21 February 2014
Smogcon - Beachhead lists
This weekend I'll be at Smogcon and trying to get into the Masters happening on the Sunday. So the next couple of posts will be my lists and what I'm planning to use in the Masters, should I get in of course.
First up is a standard 50pt, 2 list event. Asphyxious3 and Deneghra1 are my two choices and are below:
Asphyxious the Hellbringer (3)
- Deathjack
- Erebus
Mechanithralls (min)
Necrosurgeon x2
Satyxis Blood Witches (max)
- Satyxis Blood Hag
Satyxis Raiders (max)
- Satyxis Sea Witch
Ogrun Bokur
Ragman
Satyxis Raider Captain x2
Warwitch Deneghra (1)
- Nightwretch x2
- Skarlock Thrall
Boomhowler & Company (max)
Mechanithralls (min)
Necrosurgeon x2
Nyss Hunters (max)
Satyxis Raiders (max)
- Satyxis Sea Witch
Withershadow Combine
Lord Rockbottom
Dougal MacNaile
I've scheduled this for publication on Friday morning. Follow my Twitter to see updates about how I do throughout the weekend.
Thursday 13 February 2014
Winter Offensive 2 - Tournament Report - Part 2
Game 3, Destruction, vs Tom Hutchings, Circle Orboros
A very familiar face this time but
somebody who I have only played once against as he's mostly the guy
running the tournament in London. So the very busy Press Ganger had
Kromac and Morvahna2 to pick from. I expected Kromac as most use him
to play against Cryx though Tom did seem to be wavering towards
Morvahna. Anyways, I picked Gaspy3 as I knew he could do well against
most circle lists and I needed to use him at least once for
today. Tom did pick Kromac in the end and as I won the starting roll
I went first.
As usual everything runs but I don't
run the raiders up fully as I was worried about the threat ranges of
teleportation. Deathjack is on the far right and Erebus is up the
centre.

Tom moves up slightly with his beasts
and gets Kromac's upkeeps on the board. He then sends the Wild
Aggression'd stalker into my raiders killing about six of them and
retreating behind the objective. Crap, I knew the teleportation would
be far but I didn't expect it to be that far. Woldstalkers take
positions in the forest on the left and stone pillar thingy on the
right (played as concealment and rough terrain but not a forest).

So I Power Swell the raiders and send them into the stalker, who lives through the attacks. I attempt to get a blood witch on the stalker hoping to finish it off but that also fails. I should have cast Carnage but that would have left me vulnerable to Ghetorix teleporting in the same way as the stalker. At least the blood witches were incorporeal this turn. After thinking how to salvage this mistake I feat with Gaspy and charge forwards on full camp. I thought to give Tom pause about if he could kill Gaspy with the healing that his feat can produce. The right hand raider captain went into some woldstalkers and killed a couple to sprint and engage a couple more.

I was right about giving Tom
something to think about, he wonder about killing Gaspy and decided
against it. Kromac healed the stalker and moved into the left forest
at the edge of the killbox. He then cast Beastial and feated to get
back to a safe level of fury on himself. The stalker killed the rest
of the raiders surrounding him as the woldstalkers killed a couple of
blood witches. Other than that it was mostly reorganisation in Tom's
back field.
So Tom wasn't being aggressive and I
have some focus to use up. I gave Erebus a couple of focus and the
Deathjack got his usual two. The big jack cast Ashen Veil on Gaspy
and moved off to kill a woldstalker. The raider captain killed a
woldstalker with her horns then whipped the leader of that unit to
death. The blood witches took down the stalker as Erebus, Gorman and
a mechanithrall took care of the objective. Gaspy then runs to park
himself in-front of the circle army camping ten focus. Hopefully
that's enough to keep him alive.

Tom decides to go for it. The druid
wayfarer sprays Gaspy and rolls a critical, knocking him down. (When
did they give that guy crit. knockdown? I've never known it be used.)
Then the assassination is on. Ghetorix teleports behind Gaspy to hit
him a few times, Kromac and the pureblood do the same. Gaspy lives
through the attacks with two health and Kromac is right there with
one transfer left.

I look at Kromac and think about him
being easy to kill but not as easy as Ghetorix behind me as I had the
back up of mechanithralls and blood witches. Gaspy casts Carnage and
hits Ghetorix a few times. Then he's finished off by my troops so I
can dominate the zone a second time and win with five control points.

Things learnt:
Well I won't forget that the wayfarer
has critical knockdown now. Also armour 27 isn't enough to protect
against the might of circle beasts. Especially as Tom made a couple
of miscalculations. 1. he didn't add up the pureblood strength enough
and was rolling with two less power. That would have killed Gaspy. 2.
When writing this report up I realise that Ghetorix has unyeilding
and thus should have been an extra couple of armour over what Tom
told me.
Sorry Tom. Hope to play against you
again soon.
Game 4, Rally Point, vs Craig MacGregor, Legion of Everblight
So I face the third guy today who
I've only played once before. Craig got the bye in the first round
and thus used both his lists (but not really) for today. Thagrosh2
and Vayl1 were his picks and though I would have loved to play
against Vayl1 again, just for the practice, I expected Thags2 to go
down. So out came Gaspy3 to gain some benefit from all that fury I
expected on the table. I lost the starting roll this time and thus
was the second player.
Craig moves up with his heavies
slightly more on the left and the shredders on the right. The raek
runs into the right zone and dabs his toe in the zone to contest. My
raiders cover the left zone with the blood witches more in the middle
for support. Deathjack and Erebus run to the right of the board.

Then comes Thagrosh2's feat turn.
Manifest Destiny goes up and a load of beasts come into my front
lines. A scythean comes up the centre into the blood witches,
shredders all around him to do a bit of damage. The other scythean
goes into the raiders as the carnivean hangs back with the naga
nightlurker and Thagrosh.
I didn't expect that charge to
happen. Time to hit back. Deathjack gets Scything Touch on the blood
witches who go incorporeal and attack the armour twenty scythean. But
with no charges they fail to do major damage, but they do go
incorporeal to survive another turn. The ogrun bokur goes in to do a
little more damage on the scythean as Erebus and Deathjack kill two
shredders and contest the right zone. The raiders use Power Swell and
attack the nearest scythean and a few charge into the naga and
carnivean. More damage is caused but only minor of course. Then Gaspy
moves up to feat and finish off the scythean nearby. A raider captain
also removes the shepherd sneaking behind the naga.

Craig doesn't upkeep the armour buff
on the remaining scythean instead he uses it to destroy my objective
and the ogrun thanks to the chain attack. The naga and carnivean kill
a few of the raiders around themselves but don't get to move any
further forwards. Thagrosh removes the left raider captain from the
game as the forsaken move closer to kill a raider with their fury
burst thingy. Oh, and a shredder right at the back of the table
frenzied to attack the objective back there and put four points of
damage on it.
I'm slightly worried at this point as
I realise over my turn that Craig is one control point up on me and
dice down could be called. I don't think it's going to happen this
round but I need to get on top of that. So the Deathjack moves into
the centre of the zone to look at the raek there. Erebus and the
blood witches finish off the last scythean as the remaining raiders
charge into the carnivean and naga again. I use the remaining raider
captain to kill the remaining solos and sprint into a position to
charge the objective next turn. Gaspy mostly camps and mechanithralls
surround Gaspy to protect against tramples or flying Thagrosh.

Craig is running out of stuff now and
runs the last shredder into the right zone as the raek moves as far
from Deathjack as possible. Thagrosh kills a couple of raiders to put
up some clouds and protect from the incoming mechanithralls. The
carnivean and naga get cleared of the raiders finally and that's
about it.
Time to get my scenario on. Blood
witches charge the objective but leave it alive. The raider captain
kills the last shredder though as the Deathjack picks up the raek and
throws it out of the zone. Vociferon runs to get close to the
objective and Gaspy boosts damage on a Boneshaker to finish it off.
Mechanithralls charge the naga and put a little bit more damage on it
but can't get to the carnivean due to the clouds. Erebus moves into
the left zone to support Gaspy and threaten Thagrosh. 2 CPs to 1

Craig has run out of time and decides
to assassinate. Firstly the raek moves back into the right zone.
Then, after debating whether to send in Thagrosh or the carnivean he
uses scourge to knock Gaspy down and somehow ends on no fury. The way
is clear for the carnivean though and he charges in to land his
charge attack. However, Craig (and myself) hadn't noticed that the
carnivian's body was out and thus he was rolling one less damage dice
than expected (thanks to Jon for pointing that out). A few attack
rolls later and Gaspy lives with most of his boxes.
So I fill up Erebus with focus, cast
carnage and kill Thagrosh.
Things learnt:
That was my first time playing
against Thagrosh2 and I was surprised at how much damage Manifest
Destiny allowed his beasts to wreck on my lines. It did help that
Ashen Veil made the raiders difficult to hit. Other than that I was
too far forward with Gaspy when the assassination run happened.
Distance is always the best way to stop assassination and I didn't
remember that.
The Aftermath
After four rounds there was two guys on
four wins but we had ran out of time to finish off the tournament
(Jon warned us about this at the beginning of the day). Strength of
Schedule was used and I came out the winner. Ben de Bosdari came
second after being paired down twice during the day and Tom third.
All in all a good day and though Deneghra2's list isn't going to be
used in the nearby future I am glad to have given it a go.
Winter Offensive 2 - Tournament Report - Part 1
As you may have noticed I've been
having issues with gun line armies, in particular Haley1, Haley2
ones. A couple of people have suggested that Deneghra2 is the answer
to Cygnar and with her new theme list out I decided to give it a go.
Using Keith (from Muse on Minis) idea of one max unit and two min
ones for drudges I took the following lists:
Wraith Witch Deneghra
- Nightmare
- Nightwretch x2
- Skarlock Thrall
Cephalyx Mind Slaver & Drudges (max
x1, min x2)
Cephalyx Overlords x2
Mechanithralls (min x2)
- Brute Thralls x3
Necrosurgeon x2
Warwitch Siren x2
Ragman
Asphyxious the Hellbringer
- Deathjack
- Erebus
Mechanithralls (min)
Necrosurgeon x2
Satyxis Raiders (max + UA)
Satyxis Blood Witches (max + UA)
Gorman Di Wulfe
Ogrun Bokur
Satyxis Raider Captain x2
Game 1, Incursion, vs Matt Rowan, Cygnar
I have played against Matt before but
not for ages so it was great to see him again and play against is
Cygnar. Matt had Kraye with him and had paired him with Stryker2.
Both of which I felt fine to use Deneghra2. After all I had come to
the tournament to practice her. Matt then rolled a dice for his
caster to my horror and came up with Kraye for me to face. I lost the
starting roll but Matt wanted a particular side so I still got to go
first.
Using the tier 4 bonus I got Marked for
Death on the Nyss hunters, Pursuit on the gun mages and Curse of
Shadows on Gallant. Matt put the Nyss on the left, gun mages on the
right with three hunters in front. Gallant and the sentinel went in
the centre with Kraye. My first turn and the drudges ran forward. I
put the max unit in the middle and the other two on the flanks.
Everything else moved forward scooting around the building in front
of me.

Matt used Kraye first to cast Guided
Fire and ride-by-attack a drudge who lived. Then the hunters went and
shot at the right hand nightwretch who was putting his toe in a
forest. But very little damage was caused, I think because they
mostly missed. Gallant moved forward, followed by the sentinel who
only shot once with his chain gun :( After all that the Nyss moved up
but did little damage to the drudges and the same happened with the
gun mages on the right. Then the right flag went away.

I didn't upkeep Pursuit as it wasn't
doing much for this game but the other spells stayed on their targets
while Deneghra went Incorporeal. Drudges ran forwards again and tried
to tie up what they could. Nightmare moved to the central flag and
based it. The skarlock went and cast Ghost Walk on the right hand arc
node, the warwitch siren gave it a point of focus and then it ran to
be infront of the gun mages. Deneghra then cast Hellmouth on the gun
mages and left two of them alive to fail a command check. She then
moved slightly left and the mechanithrall unit with the brute thralls
bunkered up around her.

A few bits of focus went to the hunters
and Gallant at the beginning of Matt's turn and with the Nyss he
killed a fair few of the central drudge unit. The sentinel tried to
finish them off but with one shot again not much happened. Gun Mages
rallied and the hunters did something. I think they took out the arc
node on the right hand nightwretch, but not much else. Gallant then
trampled to the central flag to take a wack on Nightmare who shrugged
off the couple of hits. I score 1 control point from controlling the
left flag (nightwretch and the Overlords were both there)

My turn and with both spells upkept I
gave Nightmare three focus to remove Gallant. It only took one.
Deneghra feated and caught the hunters, Kraye, sentinel and the Nyss.
The Overseers on the left flank moved away from the flag and killed
all but one of the Nyss who then went down to the drudge's blades. In
the middle the drudges engaged the hunters and sentinel to stop them
shooting and that was about it. I'm now up to three CPs.

Matt can't move much now, the squire
and the gun mages were out so they mostly dawdle around the back
field as one runs to contest the central flag. The hunters clear off
the drudges engaging them with their axes as the sentinel does the
same with his shield. Other than that not much happens so I score
another control point.
I don't go for army points killed, I
just end my turn to score the fifth control point to win.
Things learnt:
With the drudges up front it is hard
for normal models to get through that line of tough troops,
especially when normal blast damage won't do it. Then anything solid
that gets past them is eaten up by mechanithralls, Nightmare or
Deneghra herself. I pressed forwards because Matt wasn't able to get
enough on Deneghra for assassination purposes and that allowed me to
take control of the scenario.
Game 2, Balance of Power, vs Benji Hanson, Protectorate of Menoth
Benji is a club mate and as such knew
of my plans for today, in fact I had tried out a Deneghra2 list
against him the previous weekend (he won). Still, I wanted to
practice Deneghra2 so I automatically reached for her. Benji had
Kreoss1 and Feora2 for his casters and I expected (and got) Feora2 to
be picked. As I won the roll I deployed first to push those drudges
forward.
This time around Curse of Shadows went
on the judicator, Marked for Death on the Choir and Pursuit on the
reckoner. Errants went middle right, bastions far right and
cinerators left. I kept the same set-up as last time and ran
forwards. Though I was careful about how I placed Nightmare and the
drudges around him.

Benji moved up the errants and took a
couple of shots at the drudges to take one or two down. Judicator put
a few of them on fire as well. Everything else pretty much ran to get
up the board.
I ran a drudge behind the errant
seneschal and then used it as a beacon for Hellmouth, removing a
couple of errants from play. (Forgot to mention, Marked for Death was
dropped.) The max unit of drudges also did their best to hurt the
errants and did ok at it. Nightmare had moved forwards thanks to
Pursuit and stuck around there rather than move forward. Other than
that it was my second line that advanced forwards but that was about
it.

Benji loads up the reckoner with some
focus and sends it into Nightmare. Who then dances away thanks to
Pursuit (though the free strike took off the right arm) and Benji
can't even use assault as he has stealth thanks to his affinity.
Errants try to deal with the drudges but tough makes it slightly more
difficult than normal. The judicator sends firey death around the
board killing a few things. Finally the bastions and cinerators run
forwards again.
Feat turn I feel. Deneghra goes
incorporeal, loads up Nightmare and moves into the central zone to
feat, catching most things, excluding three of the bastions.
Hellmouth takes out another three errants as well. Nightmare fails to
destroy the reckoner so some mechanithralls sort it out as the
Overseers spray both the bastions and cinerators. Drudges spend most
of their attacks on the errants and also on the seneschal, doing
enough damage to override his large self sacrifice ability. I score 2
control points.
Benji can't move much, I missed the
choir and three bastions with my feat but everything else stands
still and tries to hit what they can. A few drudges die because of
this but not much else happened. Benji had a clever idea though, he
used Fire Step to get Deneghra in Feora's control range and attempted
to move fire onto her. But being incorporeal stopped that. I score
another 2 control points and then just end my turn straight away to
win.

Things learnt:
Drudges are great Hellmouth targets
what with being DEF 11. The biggest thing was that Pursuit doesn't
allow you to ignore free strikes so I have to watch out for that in
the future.
So lets stop here and look at this
new theme list. It's good. The fact that a load of people are talking
about it and know what it involves stands to that. I know that Kaya2
got a new theme list in the same No Quarter but I can't tell you
what's in it or if anybody has been speaking about it.
Why is it good though? The drudges
don't enter into it. All they do is jam up and provide bodies for the
mechanithralls coming behind. That's great and all but I can use
satyxis, pirates or other mercenaries for this purpose and they'll do
some real damage on the way. The two units of Overlords are great,
especially when they are three points per unit. Infantry clearance in
a great package there. The real power of this theme list is the
upkeep spells starting the game on the enemy. Having those three
spells out on the board on their preferred targets is a godsend.
Before this theme list came out you could count the number of times
Pursuit was cast by Deneghra on one hand. But now you can use it to
get a massive advantage for an early feat, manoeuvre Deathjack for a
Hellmouth and retreat or advance Nightmare around a corner ready to
eat a caster or some important piece of the enemy. That's leaving out
Curse of Shadows for a free strike ignoring ARM debuff or Marked for
Death for helping your guys to hit.
Everybody who had talked about the
theme list had mentioned it's weak to Purification or Eiryss2 (or
similar). I don't disagree but I'm going to skip over that. This
theme list isn't going to be a major part of my Cryx line up at the
moment. I have good match-ups against most things out there on the
tournament scene, but as I've shown on this blog gun lines can shoot
me down in a major way. Dan Cunningham only lost with Kreoss1 in the
Invitational because that helldiver rolled fire for damage rolls.
Lewis and the way he plays both Haleys are going to take me down in a
major way. The major players out there have their Cryx game plan and
unfortunately this theme list matches up fairly well with what they
expect to play against.
Sunday 2 February 2014
Welcome to SR 2014 - Tournament report
So after the Invitational tournament I went across to Tabletop Nation to play my first 2014 Steamroller event. Hopefully you've read my quick evaluation of the new packet (link bait) so lets see that put into practice.
I took Skorne for the second time to a tournament. Both times have been 35 points but in the first tournament I won one of the three games played and I wasn't able to remember the games in enough detail to write a report afterwards. This time I was able to recall more details so I get to write about a different style of game from my usual Cryx.
I took Makeda1 and Hexeris2 to the event. Hexeris as he has a good generalist playstyle and able to cope with most things. Makeda1 as an infantry based list to counter Hexeris' beast load out.
Archdomina Makeda
- Molik Karn
- Titan Gladiator
Cataphract Cetrati (max)
Nihilators (max)
Paingiver Beast Handlers (min)
Lord Arbiter Hexeris
- Basilisk Krea
- Bronzeback Titan
- Tiberion
- Titan Gladiator
Paingiver Beast Handlers (min)
Venator Slingers (max)
James was running Searforge it seemed with Ossrum and Gorten as his two casters. I went for Makeda1 as I doubted the dwaven shooting could get through Defenders Warded Cetrati and they would be able to punch through his armour. James picked Ossrum and won the roll so picked a side that favoured him.
I won't go too much into detail about this game. James went into shield wall with his highshields in his first turn and thus was heavily out of position for the rest of the game. I won via scenario on my third turn.

Things learnt:
Perhaps I should have checked that he knew what the scenario was and what it meant for the game before we started. After his first turn I did try to check his knowledge but he assured me that he knew about the scenario.
I've seen Aaron around, mostly as a PGer running various tournaments so this was going to be the first time playing him and with Morvanha2 and Krueger2 to face me I was in a difficult choice. Makeda likes her upkeeps and Purification screws that up something rotten and Hexeris doesn't like his beasts being slowed or teleported around. In the end I decided to go for Hexeris as Tiberion wouldn't move no matter what Aaron had planned for him. Krueger was chosen and as Aaron chose to go first I picked the side with concealment leading to the zone.
Aaron's bloodtrackers preyed the slingers and immediately ran towards them. The stalker, feral and gorax also sped towards my lines with Krueger moving up fast along side them. I rushed my beasts as best I could trying to protect the gladiator and bronzeback from dying in one turn. They went to the right side with the gladiator slightly in-front of the bronzeback (I was thinking about counter charge). Tiberion went up the centre and the slingers hung back to draw the bloodtrackers further in.


Aaron sees that he's losing the capability to kill heavies and decides to try an assassination run. Krueger charges the bronzeback and casts Telekinesis at the gladiator, who is a dodging bugger thus Krueger needs a second go. Then Telekinesis is cast at Hexeris who is also missed, thanks in part to Ashen Veil being on him. The next part of the plan was for the feral to come in and attack Hexeris but with Aaron's dice not agreeing with the plan we stopped it there as the bronzeback was likely to kill Krueger who was camping nothing.
Things learnt:
Tiberion is as solid as a rock. Not moving messed up Aaron's plan's something rotten. One misplaced feral and the stalker failing to kill put me back in the game. The slingers were ablative armour for the beast handlers I feel but they were never going to be able to shoot at the blood trackers.
I played against Dave in the London Team Tournament so it was good to play him again. He'd brought along Goreshade2 and Mortenebra to use and I noticed that neither of them was really leaning on the infantry side of things so Hexeris wasn't going to be as useful as he normally is. I chose Makeda to ensure I could cover both sides of Incursion easily. Dave picked Goreshade2 with a kraken and a unit of bane thralls. I won the starting roll and decided to take first and gain board position.

My cetrati went middle left supported by the gladiator and Molik Karn went middle right supported by nihilators. Dave sent the bane thralls after the nihilators, the kraken went slightly left of the centre flag and the Withershadow Combine were out on the left. Easy first turns as always. Then the left flag disappeared.


Dave had picked what match-ups he wanted for his troops quite well and thus I didn't want to give him too many free bane thralls from my nihilators. A couple of them ran in-front of the thralls to cause free strike issues while the rest hung back in relative safety. The cetrati had Defenders Ward cast on them and they moved up behind the central flag in shield wall. Which was great against guns but against the kraken's chain weapons, not so good. Molik didn't move, he was in a good position and Makeda moved closer to her pet beast as the gladiator moved behind the cetrati again. Oh and Makeda feated to recover the expected dead models.
The plan with the nihilators worked well. Dave surround the three up front with bane thralls and thanks to some good tough rolls only killed one of them. The kraken also came in on the cetrati but thanks to poor dice rolls here every single one of them lived. Other than that not much happened.

Makeda upkept Defenders Ward and the cetrati charged the kraken. It still lived afterwards but the gladiator came in to finish it off. One of the cetrati charged Tartarus and killed him to take him out of the game. Nihilators went for the bane thralls and killed a fair few of them but tough helped Dave out as much as it did me last turn. Molik moved up slightly to get a better threat range on whatever he liked whilst Makeda moved to be within dominating range of the flags. (I should have moved slightly further right as dominating the central flag only gives one control point). Thanks to some really lucky placing of the cetrati all were within 4" of the central flag and thus I scored one control point.

Dave used the skarlock to cast Hex Blast and remove Defenders Ward from the cetrati then the necrotech moved up and turned the kraken's wreck into more scrap thralls. A couple of them attacked the cetrati for not much damage and the rest got turned into the bane thralls I'd already killed this game thanks to Goreshade's feat. The bane thralls themselves got a couple of hits on the nihilators but they bared the assault well.

As Goreshade was hanging at the back, presumably worried about Molik Karn, I decided to go for a scenario win. Molik goes for the bane thrall standard and after killing him and the officer the nihilators finished the bane thralls off. The cetrati go into shield wall and kill Admonia to stop her free upkeep. The gladiator bases the central flag but Makeda can't quite reach the right flag to dominate it. 2 CPs

Dave does a bit more damage to the cetrati by the skarlock and remaining Withershadow Combine. He also makes sure to contest the central flag with the necrotech.
My turn and Makeda casts Carnage and Fate Walker on herself. With the Carnage bonus the gladiator easily deals with the necrotech as the cetrati finish off everything else except Goreshade. Makeda Fate Walks to the right flag to score the five control points.

Things learnt:
Dice can be really fickle. One turn I made five tough checks out of six or seven attacks. Also the threat of Molik Karn had a greater affect than his actual killing power this game.
Skorne on both sides of the final table isn't something you see usually and though Sherwin was playing different lists I knew from our previous games he's a good player. He'd been using Makeda3 for the first three games and thus was locked into Naaresh to face me. I chatted it over with Chris Cawthorn and he suggested that Makeda was the right choice as the beasts can only kill a couple of cetrati at a time, leaving the other to hit back strong. I don't know exactly why I chose Hexeris instead. Gut feeling or the fact Tiberion tanked a stalker so I was over confident in his abilities. Anyways, I won the starting roll and decided to go second to get the better side and get the chance to score first.

Sherwin's first turn gets the bronzeback and gladiator towards the left zone, rhinodon in the centre and nihilators on the right. I run Tiberion up the centre, bronzeback left and gladiator behind Tiberion. My slingers went right with a few in-front to take the first hit.


Sherwin sends in the rhinodon to the right-hand zone and kills a slinger. This let the nihilators come through the gap and engage a couple of slingers. Sherwin's gladiator ended up in the middle of the board after casting rush on the rhinodon. His bronzeback just moved in to be opposite mine in the left zone. Finally the agoniser moved up and his wails caused my warbeasts to be hitting at less power.
My turn and I need to sacrifice a beast to deal with the rhinodon. Gladiator and rush are far too important and the bronzeback is out on the flank so that left Tiberion to deal with him. The slingers went first and tried to kill the agoniser but couldn't get enough damage on the poor tortured thing to put it out of its misery. Hexeris then went and with his feat cast two Ashes to Ashes into the nihilators but left a couple alive. The feat did allow me to steal a load of focus from Sherwin's beasts but I should have saved the feat for later I feel (hindsight helps a lot). Tiberion then went and wacked the rhinodon. I was still within the aura of the agoniser but I still destroyed the beast and put Bump on myself to cause issues.

Sherwin sends the last two nihilators into the slingers, but with Ashen Veil not much happened. The cyclops shaman then charged Tiberion to remove Bump. His gladiator came in and with help from enrage killed Tiberion. Sherwin was considering an assassination run and possibly could have done it, except critical smite on Tiberion made him nervous and after he killed Tiberion I had too many transfers to get through. Instead he feated to protect his beasts (extra armour) and used his bronzeback to destroy the left objective.

Sherwin had a load of fury on the board at the end of his turn but I was most worried about destroying his remaining heavies. I buffed up my beasts as best I could, even paralysing the enemy bronzeback. Sent them in and didn't kill either the bronzeback or gladiator. This could have been possible if I'd remembered that titans add their tusks to headbutt damage rolls. Opps. Anyways. The slingers try to deal with the nihilators but one still lived.
The bronzeback had all its fury removed and was quite happy on the left. Sherwin's gladiator however, decided to frenzy and hit my gladiator. The cyclops shaman tried to get some damage on my gladiator but failed so Sherwin sent in Naaresh to destroy the right objective and get ahead on scenario. He failed though, leaving it on a wound or two. His bronzeback did better, removing mine from the table.

My turn and I see an opportunity here. The slingers finish off the objective and the agoniser whilst the gladiator killed its counterpart and put some damage on the shaman. Hexeris then charged Sherwin's bronzeback and destroyed him. One boosted Hellfire into a beast handler and I had control of the left zone. One fury though and my beast handlers ran up to cause charge lane issues.
Sherwin sees that he has no heavy killing power and decides to go for the assassination. One unit of beast handlers buff Naaresh whilst one of the others kills a beast handler of mine in the way. Naaresh then comes in to deal the finishing blow but Hexeris lives though the attacks as Sherwin boosts a few attack rolls. At this point dice down is called and I win, five control points to one.

Things learnt:
Tiberion isn't as much of a tank as I hoped. I'm also having issues with the slingers as they didn't really do much in this match-up either. We'll see about them in the future. Other than that I will now remember about hard head helping out my damage rolls.
So I won my first tournament with Skorne. That Makeda list worked pretty well and Hexeris worked well enough but needs revision for the future. Maybe when I have incindiarii built I can put them in the list.
I took Skorne for the second time to a tournament. Both times have been 35 points but in the first tournament I won one of the three games played and I wasn't able to remember the games in enough detail to write a report afterwards. This time I was able to recall more details so I get to write about a different style of game from my usual Cryx.
I took Makeda1 and Hexeris2 to the event. Hexeris as he has a good generalist playstyle and able to cope with most things. Makeda1 as an infantry based list to counter Hexeris' beast load out.
Archdomina Makeda
- Molik Karn
- Titan Gladiator
Cataphract Cetrati (max)
Nihilators (max)
Paingiver Beast Handlers (min)
Lord Arbiter Hexeris
- Basilisk Krea
- Bronzeback Titan
- Tiberion
- Titan Gladiator
Paingiver Beast Handlers (min)
Venator Slingers (max)
Game 1, Outflank, vs James Layfield, Mercenaries
James was running Searforge it seemed with Ossrum and Gorten as his two casters. I went for Makeda1 as I doubted the dwaven shooting could get through Defenders Warded Cetrati and they would be able to punch through his armour. James picked Ossrum and won the roll so picked a side that favoured him.
I won't go too much into detail about this game. James went into shield wall with his highshields in his first turn and thus was heavily out of position for the rest of the game. I won via scenario on my third turn.
Things learnt:
Perhaps I should have checked that he knew what the scenario was and what it meant for the game before we started. After his first turn I did try to check his knowledge but he assured me that he knew about the scenario.
Game 2, Destruction, vs Aaron Wilson, Circle Orboros
I've seen Aaron around, mostly as a PGer running various tournaments so this was going to be the first time playing him and with Morvanha2 and Krueger2 to face me I was in a difficult choice. Makeda likes her upkeeps and Purification screws that up something rotten and Hexeris doesn't like his beasts being slowed or teleported around. In the end I decided to go for Hexeris as Tiberion wouldn't move no matter what Aaron had planned for him. Krueger was chosen and as Aaron chose to go first I picked the side with concealment leading to the zone.
Aaron's bloodtrackers preyed the slingers and immediately ran towards them. The stalker, feral and gorax also sped towards my lines with Krueger moving up fast along side them. I rushed my beasts as best I could trying to protect the gladiator and bronzeback from dying in one turn. They went to the right side with the gladiator slightly in-front of the bronzeback (I was thinking about counter charge). Tiberion went up the centre and the slingers hung back to draw the bloodtrackers further in.
This went about a well as expected as the bloodtrackers took down a couple of the slingers thanks to prey and the fact they are easy to kill. Krueger moved up and feated on my beasts but Tiberion stayed in one place. The stalker and feral moved up as well, the feral to just outside the fence in the centre of the zone.
And that's what gave me hope. I could rush Tiberion and at reach start to hit the feral. Hexeris went first and with his feat killed four bloodtrackers via two ashes to ashes (I had to target my objective to get them). The slingers ran in to cause issues with the blood trackers while rush was cast from the gladiator onto Tiberion. He moved up and hit twice as he boosted both attack rolls. With the second I rolled the critical and wacked the feral into the objective to cause some more damage.
Aaron asks about the shield and how it applies to attacks in the rear (it doesn't). The bloodtrackers finish off the slingers but cause little damage to anything else. Then Krueger moves up and casts Telekinesis on Tiberion, who doesn't move. So with Primal on the stalker it comes in to hit Tiberion a bit, who lives with one health. The feral retreats and licks its wounds a bit.
My bronzeback and Tiberion get enraged thanks to the beast handlers and the gladiator puts rush on the bronzeback who promptly charges the gallows grove next to the objective and puts them both into the ground. Ashes to Ashes get cast at the bloodtrackers again and Tiberion gets healed up thanks to Vampiric Harvest. He then charges the stalker (moving 0") and again, with the last hit gets the critical to send the feral away. He doesn't get much of a distance unfortunately but the attack kills the stalker exactly.
Aaron sees that he's losing the capability to kill heavies and decides to try an assassination run. Krueger charges the bronzeback and casts Telekinesis at the gladiator, who is a dodging bugger thus Krueger needs a second go. Then Telekinesis is cast at Hexeris who is also missed, thanks in part to Ashen Veil being on him. The next part of the plan was for the feral to come in and attack Hexeris but with Aaron's dice not agreeing with the plan we stopped it there as the bronzeback was likely to kill Krueger who was camping nothing.
Things learnt:
Tiberion is as solid as a rock. Not moving messed up Aaron's plan's something rotten. One misplaced feral and the stalker failing to kill put me back in the game. The slingers were ablative armour for the beast handlers I feel but they were never going to be able to shoot at the blood trackers.
Game 3, Incursion, vs Dave Downs, Cryx
I played against Dave in the London Team Tournament so it was good to play him again. He'd brought along Goreshade2 and Mortenebra to use and I noticed that neither of them was really leaning on the infantry side of things so Hexeris wasn't going to be as useful as he normally is. I chose Makeda to ensure I could cover both sides of Incursion easily. Dave picked Goreshade2 with a kraken and a unit of bane thralls. I won the starting roll and decided to take first and gain board position.
My cetrati went middle left supported by the gladiator and Molik Karn went middle right supported by nihilators. Dave sent the bane thralls after the nihilators, the kraken went slightly left of the centre flag and the Withershadow Combine were out on the left. Easy first turns as always. Then the left flag disappeared.
Dave had picked what match-ups he wanted for his troops quite well and thus I didn't want to give him too many free bane thralls from my nihilators. A couple of them ran in-front of the thralls to cause free strike issues while the rest hung back in relative safety. The cetrati had Defenders Ward cast on them and they moved up behind the central flag in shield wall. Which was great against guns but against the kraken's chain weapons, not so good. Molik didn't move, he was in a good position and Makeda moved closer to her pet beast as the gladiator moved behind the cetrati again. Oh and Makeda feated to recover the expected dead models.
The plan with the nihilators worked well. Dave surround the three up front with bane thralls and thanks to some good tough rolls only killed one of them. The kraken also came in on the cetrati but thanks to poor dice rolls here every single one of them lived. Other than that not much happened.
Makeda upkept Defenders Ward and the cetrati charged the kraken. It still lived afterwards but the gladiator came in to finish it off. One of the cetrati charged Tartarus and killed him to take him out of the game. Nihilators went for the bane thralls and killed a fair few of them but tough helped Dave out as much as it did me last turn. Molik moved up slightly to get a better threat range on whatever he liked whilst Makeda moved to be within dominating range of the flags. (I should have moved slightly further right as dominating the central flag only gives one control point). Thanks to some really lucky placing of the cetrati all were within 4" of the central flag and thus I scored one control point.
Dave used the skarlock to cast Hex Blast and remove Defenders Ward from the cetrati then the necrotech moved up and turned the kraken's wreck into more scrap thralls. A couple of them attacked the cetrati for not much damage and the rest got turned into the bane thralls I'd already killed this game thanks to Goreshade's feat. The bane thralls themselves got a couple of hits on the nihilators but they bared the assault well.
As Goreshade was hanging at the back, presumably worried about Molik Karn, I decided to go for a scenario win. Molik goes for the bane thrall standard and after killing him and the officer the nihilators finished the bane thralls off. The cetrati go into shield wall and kill Admonia to stop her free upkeep. The gladiator bases the central flag but Makeda can't quite reach the right flag to dominate it. 2 CPs
Dave does a bit more damage to the cetrati by the skarlock and remaining Withershadow Combine. He also makes sure to contest the central flag with the necrotech.
My turn and Makeda casts Carnage and Fate Walker on herself. With the Carnage bonus the gladiator easily deals with the necrotech as the cetrati finish off everything else except Goreshade. Makeda Fate Walks to the right flag to score the five control points.
Things learnt:
Dice can be really fickle. One turn I made five tough checks out of six or seven attacks. Also the threat of Molik Karn had a greater affect than his actual killing power this game.
Game 4, Process of Elimination, vs Sherwin, Skorne
Skorne on both sides of the final table isn't something you see usually and though Sherwin was playing different lists I knew from our previous games he's a good player. He'd been using Makeda3 for the first three games and thus was locked into Naaresh to face me. I chatted it over with Chris Cawthorn and he suggested that Makeda was the right choice as the beasts can only kill a couple of cetrati at a time, leaving the other to hit back strong. I don't know exactly why I chose Hexeris instead. Gut feeling or the fact Tiberion tanked a stalker so I was over confident in his abilities. Anyways, I won the starting roll and decided to go second to get the better side and get the chance to score first.
Sherwin's first turn gets the bronzeback and gladiator towards the left zone, rhinodon in the centre and nihilators on the right. I run Tiberion up the centre, bronzeback left and gladiator behind Tiberion. My slingers went right with a few in-front to take the first hit.
Sherwin sends in the rhinodon to the right-hand zone and kills a slinger. This let the nihilators come through the gap and engage a couple of slingers. Sherwin's gladiator ended up in the middle of the board after casting rush on the rhinodon. His bronzeback just moved in to be opposite mine in the left zone. Finally the agoniser moved up and his wails caused my warbeasts to be hitting at less power.
My turn and I need to sacrifice a beast to deal with the rhinodon. Gladiator and rush are far too important and the bronzeback is out on the flank so that left Tiberion to deal with him. The slingers went first and tried to kill the agoniser but couldn't get enough damage on the poor tortured thing to put it out of its misery. Hexeris then went and with his feat cast two Ashes to Ashes into the nihilators but left a couple alive. The feat did allow me to steal a load of focus from Sherwin's beasts but I should have saved the feat for later I feel (hindsight helps a lot). Tiberion then went and wacked the rhinodon. I was still within the aura of the agoniser but I still destroyed the beast and put Bump on myself to cause issues.
Sherwin sends the last two nihilators into the slingers, but with Ashen Veil not much happened. The cyclops shaman then charged Tiberion to remove Bump. His gladiator came in and with help from enrage killed Tiberion. Sherwin was considering an assassination run and possibly could have done it, except critical smite on Tiberion made him nervous and after he killed Tiberion I had too many transfers to get through. Instead he feated to protect his beasts (extra armour) and used his bronzeback to destroy the left objective.
Sherwin had a load of fury on the board at the end of his turn but I was most worried about destroying his remaining heavies. I buffed up my beasts as best I could, even paralysing the enemy bronzeback. Sent them in and didn't kill either the bronzeback or gladiator. This could have been possible if I'd remembered that titans add their tusks to headbutt damage rolls. Opps. Anyways. The slingers try to deal with the nihilators but one still lived.
The bronzeback had all its fury removed and was quite happy on the left. Sherwin's gladiator however, decided to frenzy and hit my gladiator. The cyclops shaman tried to get some damage on my gladiator but failed so Sherwin sent in Naaresh to destroy the right objective and get ahead on scenario. He failed though, leaving it on a wound or two. His bronzeback did better, removing mine from the table.
My turn and I see an opportunity here. The slingers finish off the objective and the agoniser whilst the gladiator killed its counterpart and put some damage on the shaman. Hexeris then charged Sherwin's bronzeback and destroyed him. One boosted Hellfire into a beast handler and I had control of the left zone. One fury though and my beast handlers ran up to cause charge lane issues.
Sherwin sees that he has no heavy killing power and decides to go for the assassination. One unit of beast handlers buff Naaresh whilst one of the others kills a beast handler of mine in the way. Naaresh then comes in to deal the finishing blow but Hexeris lives though the attacks as Sherwin boosts a few attack rolls. At this point dice down is called and I win, five control points to one.
Things learnt:
Tiberion isn't as much of a tank as I hoped. I'm also having issues with the slingers as they didn't really do much in this match-up either. We'll see about them in the future. Other than that I will now remember about hard head helping out my damage rolls.
So I won my first tournament with Skorne. That Makeda list worked pretty well and Hexeris worked well enough but needs revision for the future. Maybe when I have incindiarii built I can put them in the list.
Thursday 30 January 2014
Invitational Tournament Report
This time around the tournament needed four lists to be used at least once over six games. The first day involved a group stage of four players and three games, the top two go through to the top eight on the second day the bottom two to the bottom eight. After that it was a fairly simple Steamroller (ish). I knew I would be taking Gaspy3 and Deneghra1 as those lists are running smoothly. After a lot of thought I changed Skarre1 to remove the support solos and the kraken. Instead she ran with Mechanithralls, lots of mechanithralls and brute thralls. I did this because of Dan Cunningham (the Menoth player from Blood & Oil). We chatted after the game there and I realised that though that list had some good points, against a great player they can scalpel out the right pieces and leave Skarre1 vulnerable. So I decided to go for brute force and thus had 71 models in that list. I bounced around that fourth list a lot but decided to go for Mortenebra's theme force. I played her a lot before Colossals came out but she can't crack armour like other Cryx casters so she's been sat on the shelf awhile now.
The Lists:
Asphyxious the Hellbringer
- Deathjack
- Erebus
Mechanithralls (min)
Necrosurgeon x2
Ogrun Bokur
Ragman
Satyxis Blood Witches (max) + UA
Satyxis Raiders (max) + UA
Raider Captain x2
Warwitch Deneghra
- Nightwretch x2
- Skarlock Thrall
Boomhowler (max)
Mechanithralls (min)
Necrosurgeon x2
Nyss Hunters (max)
Satyxis Raiders (max) + UA
Withershadow Combine
Lord Rockbottom
Dougal MacNaile
Master Necrotech Mortenebra
- Harrower x2
- Leviathan
- Reaper
- Scavenger x2
- Stalker x2
Necrotech x2
Warwitch Siren x2
Pirate Queen Skarre
- Helldiver x2
- Skarlock Thrall
Bane Knights (max) x2
Mechanithralls (max) x3
- Brute Thralls x7
Necrosurgeon x2
Saxon Orrik
On the day the draw for the group stages happened and though they split the top four players into a group each, none of the opponents were going to be an easy game. At the end of the draw I was going to be facing Paul Watson (Cryx), Jamie Perkins (Khador) & Dan Cunningham (Menoth). Oh dear.
Game 1, Destruction, vs Dan Cunningham, The Protectorate of Menoth
Was I worried about this game? Oh yes. Dan had a very good shot to defeat me the first time we'd faced and I knew this would be a very difficult game. But that's why I go to tournaments. Anyways, Dan had Harbinger, Feora2, Kreoss1 and High Reclaimer to choose from. I wasn't exactly sure which he would go for but I was going to put down Skarre1 or Deneghra1 for preference. With the prescience of the judicator I didn't fancy the chances of Nyss so Skarre1 threat saturation it was. Dan picked Kreoss1 while I went first to gain ground on Dan.

You'll see from the photos I was kinda bottle-necked by the building on my left but I spread out as much as I could and interspersed the bane knights to make judicator shots slightly more risky to trigger vengeance. On Dan's first turn he moved up slightly with errants and zealots taking a couple of shots with the judicator to remove a couple of the right-hand mechanithralls from the table.

Dan is very good at judging distances it seems. Everything was 12" from the nearest mechanithralls and the knights didn't have vengeance to help close the distance. So I ran pretty much everything forward, just not at full speed so I could spread out more and save some of my models from the terrible shooting sure to come down on my head. Skarre then moved up and with her feat attempted to protect as much as I could from Dan's shooting.

Here Dan carefully kills those outside Skarre's feat, including a brute thrall from my right. That mechanithralls unit over there is getting battered by Dan's shooting. The judicator and the errants didn't advance and the zealots used their mini-feat to stop anything I could do to them and protected the left side of the board. My feat protected me from the worst of the shooting that turn, it won't happen again.

My turn and I still can't get to Dan with most of my force. All I can do now is reduce the effectiveness of Kreoss' feat which is definitely happening this turn. My helldivers move up again, and are now very close to his front lines. My front lines attack him, firstly by removing the right-hand objective, then a couple of knights remove an errant from the table. The zealots become engaged by a couple of the left-hand knights and a mechanithrall or two while the rest of my force is there waiting to be shot as they can't get any closer.

Dan feats and down the front half of my army goes. Zealots move up and damage an objective but fail to remove it. Errants have a slightly bad turn as though they can hit my knocked down stuff with their swords, Quick Work failed to hit two or three times into my other models relaxing on the ground. The Judicator kills some Knights and Mechanithralls and by the end of the turn I'm not left with much inside 14" of Kreoss.

However, a helldiver pops up right next to Kreoss. He immediately gets three focus and Skarre casts Dark Guidance to help the little guy hit. Dan had put Defender's Ward on Kreoss and was camping a fair amount but that didn't seem to matter to the helldiver as he left Kreoss with 4 health after hitting with both attacks and boosting damage both times. A couple of bane knights then remove the other enemy objective and a few brute thralls run up to engage or block line of sight to Skarre who was camping a little bit but not enough to be totally safe.

Dan gets battle up on his jacks and using the devout he kills the nearby helldiver. Kreoss moves to the back of the board to get away from what is left of my troops and everything else tries to kill as much as possible. My right flank totally collapses and I'm left with four bane knights from the left-hand unit. So I decide it is time to end the game, one way or another. Skarre gives three focus to the remaining helldiver, moves up to be behind a wall and casts Backlash on the judicator. A boosted Hellfire comes next and does one point to Kreoss. The helldiver does two more thanks to boosted damage. Finally three bane knights get the angle thanks to vengeance and Kreoss goes down.

Things learnt:
That Skarre list is powerful, but again, against an opponent who can stay at range and pick off certain pieces as the game progresses it doesn't do so well. I don't see myself using it again anytime soon. So I've got to come up with a better list for a Masters event.
Game 2, Close Quarters, vs Paul Watson, Cryx
Since the 2012 Welsh Open Paul has played Menoth, Legion and brought Cryx to this tournament whereas I'm still on Cryx. Even with the faction switching I was still worried as Paul had to be a good player to get into the Invitational.
Paul had brought along Terminus, Skarre1, Goreshade2 (theme list) and Deneghra1. Terminus doesn't really play well in the mirror match, nor does Goreshade2. I glanced over Skarre's list and Deneghra's and decided that Paul was going to pick Denny. What's the best answer I had to the control spells she'd be casting? Deneghra1 with the Withershadow Combine. And yep, it was a Deneghra1 mirror match. I lost the starting roll so I picked the side which slightly protected my flag with a wall.

His first turn everything ran. But the raiders didn't come screaming across the table, Paul held them back to hit at a similar time as the rest of his force. So I did something similar while running an arc node to get Crippling Grasp on Paul's raiders. My Boomhowlers went left towards his flag (thanks to Ghost Walk) and my raiders went centre-right around my flag with Nyss on the right to fight against Paul's blood witches. (Anybody confused yet? Because I am)

Paul gives a charge order to the blood witches and most of them run forward and go incorporeal as the blood hag kills one of Paul's raiders to dispel Crippling Grasp (I'd forgotten that trick). Raiders then come in and destroy my front most arc node whilst engaging a few of the raiders. Nyss come up my left flank and do a fairly good job of killing a few Boomhowlers. Paul's left arc node runs in and engages two Boomhowlers whilst the right one moves behind his raiders to enable Crippling Grasp to be cast on my raiders.

I decide to ignore the blood witches for now and my Deneghra moves up to feat and cast Ghost Walk on the raiders. With her feat I covered all but one of Paul's bile thralls so my Nyss moved up slightly and with help from Master Gunner MacNaile shot all but one off the table. My Raiders move up and engage a fair amount of Paul’s stuff on my right flank and kill a few of his raiders whilst they were at it. Boomhowlers move up further and have another turn of super-tough. Meanwhile my necrosurgeons are filling up the Mechanithralls as things are starting to die. One control point goes to Paul though as I fail to contest his flag.

Right, I'd better get the scenario under control then. A couple of raiders run into contest his flag as I get Crippling Grasp onto the Nyss and reduce the raiders and blood witches to a couple of models each. My raiders are pretty much half strength at this point and the Boomhowlers are taking a heavy beating from Paul's Nyss. My Nyss though take care of the right flank and are full strength over there.

Paul is under pressure and he decides that assassination is the way to go. A warwitch siren clears the mechanithralls engaging his centre arc node and it moves into a clear area. His Deneghra then gets Scourge onto a nearby Withershadow Combine member to knock Deneghra down. A boosted Venom from his Deneghra and an unboosted one from his second warwitch siren leaves my Deneghra low on health. Paul then moves up his raider captain to behind the wall and takes a hand cannon shot. From more than 5" away. I remind him about stealth and he realises that it was an unlikely assassination. So he kills all my mechanithralls instead. Ouch. Three control points to Paul.

With no mechanithralls to refill I keep all my focus and the necrosurgeons heal Deneghra quite successfully, getting her almost to full health. Crippling Grasp was upkept for free as Admonia was still on the board. This point I try to kill as much as I can to ensure no further assassinations could come my way. Nyss heavily damage the bone jack, taking out it's arc node and my raiders charge in to Paul's skarlock and Deneghra. I manage to get a lucky double and knock her down thankfully. So Rockbottom moved up and sprayed Deneghra and a Nyss or two. The Nyss died and Deneghra went down to a couple of health while being on fire.

The fire goes out though and Paul makes a few attack here and there to forestall the incoming Nyss from my right but it's not enough as only a couple of my troops go down. It's around this time that I realise that Paul hasn't kept on top of his clock. I don't remember the exact times but I was around the 15 minute mark for time left but Paul ended this turn with a minute and a half on his. He also hasn't managed to clear off his flag so the control points were still three to nothing.

So I take down heavily damaged arc node, the blood witches and the raiders whilst running my necrosurgeons and stitch thralls into contest Paul's flag. The game ends with Paul attacking with Deneghra but running out of time.

Things learnt:
I should protect my mechanithralls slightly better. I used them slightly too aggressively and Paul took them down easily, especially with warwitch siren sprays.
Game 3, Into the Breach, vs Jamie Perkins, Khador
Slightly odd situation here as we had both won two games and therefore were through to the top eight on the second day. I asked Jamie if he had a fourth list he wasn't confident with and we ended up with Mortenebra vs Irusk1. No idea how Irusk1 becomes a "use once" caster but as Jamie said, "oh how the mighty have fallen".

Anyways, I won the starting roll and took first turn to take full advantage of first round stealth. Against an army full of Black Dragons :) I'm in a fairly central location and send each of my stalkers on a flanking mission while the scavengers move up behind the crab jacks. Jamie moves up the black dragons in shield wall and the conquest up through the forest in his centre. Widowmakers take a couple of shots here and there but I don't think much happened.


I keep my left harrower back at the edge of the zone with the scavengers slightly further back. I did think about sending in the Spectral Steel scavenger but the distance probably was too far and I didn't want to risk it this early. I also try to kill as many widowmakers as possible but they are slightly hard to hit in the woods so not much happens. Jamie's black dragons use their Iron Zeal ability and shield wall to become armour 22. Irusk feats to save as many of them as possible and the conquest moves up again. Whilst this is happening the widowmakers take down Deryliss.
Time to do some damage. Mortenebra sends in the harrowers under Terminal Velocity to kill as many black dragons as possible. I forgot to get Overrun on one of them though and only killed the local pikemen rather than moving on to another group. The Spectral Steel scavenger moves up to threaten Irusk as the other one moves to engage some pikemen. Jamie responds with Battle Lust being cast on both units and a mass of attacks hit my harrowers. Both survive due to limited space to charge but only one kept it's melee arm fully active. My reaper is killed by the conquest as various flanking forces fight amongst themselves. Harlan Versh popped out to take a shot at the scavenger (Purgation, it's a thing) but the first attack missed.

That conquest is getting closer and I don't like it. I decide to end the game as fast as I could and after allocating a focus to the scavenger and upkeeping Spectral Steel Mortenebra casts Terminal Velocity and feats. She then charges the leviathan to get extra distance on the feat and misses her attack. The final part of the plan is casting Overrun on the working harrower who does his duty and kills a black dragon or two. The scavenger moves up and then charges Irusk. Two attacks later and Irusk is damaged but still living. Conquest then gets a full load of focus and with one hit kills Mortenebra.


Things learnt:
Keep the support staff alive. With Deryliss on the table I could have given the scavenger three focus and more than likely killed Irusk. It was stupid of me to move him up that close to the front lines and I paid the price.
I've also looked over the photos I took of the game and realised that I was in a much better position than I thought I was. The black dragons were mostly dead and that left Jamie with a conquest and a dragoon to damage me. Perhaps I should have hung on a turn to cement my position. But it was the last game of the day, it was less important game given that we both qualified by that point and it was a good fun game.
Game 4, Process of Elimination, vs Matt Oakley, Legion of Everblight
The draw for the second day was done Saturday evening so I had all night to panic over my list selection. MOak had Lylyth2, Saeryn, Vayl2 and Vayl1 to choose from, all of which are nasty casters. Knowing that most Legion casters prefer Saeryn as an anti-Cryx caster I was happy choosing Gaspy3. Yes, he is mostly melee based but the feat and Ashen Veil do some wrong things to beast heavy lists. Lylyth2 was a possibility but ARM 24 when camping isn't bad, plus I can remove one shot with the Bokur. Turns out I was right and MOak choose Saeryn to face me.
I take the first turn and Deathjack and Gaspy move up the centre to respond to anything. Erebus and the raiders go right and the blood witches move left. MOak has done well and set up his hex hunters vs my blood witches and the deathstalkers vs my raiders, i.e. the best targets for both those units. But he moves up very cautiously as well. Nothing comes into the zone and the deathstalkers even move backwards from the photo I took.

Oh well, MOak will get the first chance to score so I'd better make the zones be under my control. Blood witches move into the centre of the left zone with Deathjack putting his toe in behind them. Raiders do the same on the right with Erebus right in the centre of the zone. Other than that I wanted to let MOak come to me and have to feat first to stay safe.

Which he does do. I can't remember the exact order of the things but hex hunters take out a couple of witches. A harrier uses its animus and charges my raider captain on the left, then sprints to tie up a couple of witches. Saeryn feats and an angelius attacks the left objective but some bad dice leaves it standing. So the other angelius shoots the objective and takes it down. The scythean engages a few of my raiders but no attacks were successful.

So I can't attack MOak's beasts and a couple of armour piecing attacks will do some damage to Gaspy. I decide to put Deathjack out front and let him take the brunt of the attacks. Ashen veil goes on Gaspy from the Deathjack as Gaspy moves up behind him to feat. My raiders and Erebus take down the right objective while fully surrounding the scythean at reach to prevent Blight Bringer killing them. The blood witches go incorporeal but can't do much damage to the hex hunters and just prepare for the attacks to come in.

MOak takes the bait and comes in to destroy the Deathjack as Gaspy was sitting there at DEF 17 thanks to Ashen Veil. Two anglius come in but after all the attacks he still stands due to some poor dice on attack and damage. So the scythean moves across and takes a free strike from a raider. No damage was caused but a double two comes up and the scythean falls over stopping the Deathjack from being destroyed. Hex hunters come into the blood witches and do some damage as a harrier or shredder runs in to be a Blight Bringer target and remove a few more blood witches and mechanithralls. Over on the right a raek jumps into a couple of raiders but not much happens over there.
Time to destroy the heavies as they are all in one place now. Deathjack and Erebus get a full focus load (Deathjack had lost both arms though, so only three focus). The Deathjack goes first and though he takes a free strike from an angelius it has one box of cortex left which is enough to kill the scythian by his tusks. Gaspy moves across and kills the lesser to get Carnage up and running, then kills one of the angelius. Mechanithralls attempt to kill the last angelius but fail and I send in Erebus. Unfortunately I decided to walk him and leave the angelius .6" away from him. Bugger. My raiders damage the raek but also leave it alive and the blood witches continue their battle with the hex hunters.

MOak uses the angelius to destroy the Deathjack and damage Erebus. The raek takes out a few of the raiders and the blood witches are finished off by the hex hunters but not much else happens as we have both lost a load of our armies.
Gaspy moves into the left zone to get away from Saeryn and the angelius while attempting to clear it out and dominate. I fail thanks to the pot toeing in but the mechanithralls and Erebus deal with the angelius to keep Gaspy safe. The ogrun bokur deals with the raek as well and leaves that zone only defended by a shepherd and another solo. At this point MOak concedes.

Things learnt:
If it looks really close why risk it? Erebus should have charged just to ensure he got there. Better to do some damage than none at all.
Game 5, Incursion, vs Matt Goligher, Legion of Everblight
Matt had been relying heavily on Vayl2 throughout the tournament it seems and was left having to either play Vayl1 or Lylyth2 vs me. I stuck to the idea of Gaspy3 and expected Lylyth2 to be chosen. Turns out Matt went for Vayl1, somebody I wish I had more practice against. But it will be fine. Won't it?
I take first turn again and send the raiders through the forest on the left, blood witches up the right and everything else up the centre. Matt sends a couple of hex hunters to the right of the centre flag but hangs everything else around the hill on his side of the board. Then the right-hand flag disappears.

At this point I could have ran my raiders into his army to jam up and attempt to score scenario points that way. I decided not to as I'd be wasting their corpses and they are still a major threat if they hang around the left flag waiting for the right moment to strike. The blood witches go incorporeal, not that it'll save them, and take out the two hex hunters while claiming the area behind the centre flag. My heavies and Gaspy move into the nearby forest and wait to see how it goes.

Now after his first turn I knew I was in trouble, Matt moved his models confidently and with purpose. This turn showed me how badly I'd messed my turn up. Hex hunters came in and took down all but the blood hag from her unit. Due to misplacement of my stitch thralls though I only got a couple of corpses from this massacre. Vayl moves up, gets my jacks under the influence of Incite and feats. Her beasts then come in and with ranged attacks they do some damage to my warjacks then a scythean comes in and wrecks both Deathjack and Erebus. One turn and both my heavies are gone and I didn't feat to at least get a little bonus out of this. Crap. Then the worst thing of all happens, Matt retreats with his army out of most of my threat ranges. Oh and scores a control point from the middle flag.

Time to get some value out of this charlie foxtrot. Mechanithralls kill a couple of things around the centre flag but are mostly there to contest that flag. The raiders do the same and charge in from the left to the centre. I can't quite concentrate the damage on one beast so their targets live. Gaspy then casts Mobility and charges to base the left flag. The harrier that had gotten there died to his sword and I used Blood Boon to get Ashen Veil on Gaspy while he also feated for that little bit extra protection.

With Matt's beast heavy list and the placing of the beasts on the left side I was assured to get a little bit of extra focus next turn. Typhon was used to clear off the centre flag as the scythian and ravagore moved into contest the left flag. The Seraph also helped out by killing a couple of raiders. Some other stuff happened but the most important thing was Vayl moved to base the centre flag and scored two more control points for Matt. 3-2 CPs to Matt.
I'm buggered now. I can't get to Vayl for an assassination run and she's camping around 4 fury so even if I could get there I wouldn't get past the transfers. I also don't have enough heavy stuff to contest the flag with any sort of certainty, so I try the next best thing, get control points. With the focus Gaspy moves around the flag and destroys the ravagore. He can't quite reach the scythean though and so the bokur goes for a slam to get the last contesting model out of the way. But even with the client bonus he misses and the scythean stays there. So I just run mechanithralls in to contest the centre flag and pass the turn over.

Things learnt:
Practice against as many different casters as possible. It's difficult at times but worth it. My major mistakes that game where underestimating Vayl's threat range extenders and thus misplacing my heavies so they could both die in one turn. I also failed with the placements of the stitch thralls meant to collect the blood witches' corpses. Would it have been enough for a win, probably not. Would it have gone better for me, most definitely. Matt knew what his army could do and applied it in the best way possible.
Game 6, Outflank, vs Lewis Johnson, Cygnar
Lewis seemed to feel bad about our last game and wanted a little more of a fun game this time around, given that in this tournament it was pretty much first or nothing. After a bit of discussion we ended up with a Haley2 vs Gaspy3 match up. Let's see how this turns out.
I've got a forest in the centre of my side so the Deathjack and Gaspy move up that way thanks to Mobility. Raiders go left and blood witches right, backed up by Erebus. Lewis sends the stormwall to the left, gun mages in the centre and the storm lances on the right. But he doesn't move up that far so I have to come to him.

I do come forward slightly, raiders spread out in the left zone and the blood witches do something similar on the right as they go incorporeal for the turn. Deathjack and Gaspy cower in the forest afraid of the major threat range of the stormwall under Haley's control. Erebus puts his toe in the right zone to support the blood witches and I pass the turn fully expecting Lewis to feat.

But he doesn't. Aiyanna gives the storm lances magical weapons who attack the blood witches but only kill a couple of them. Arcane Shield also gets cast on the storm lances to help protect them. The gun mages are given Deadeye and shoot a couple of raiders at range while the stormwall lays down covering fire to prevent raider charges. The hunter shoots at Erebus and hits both times to remove its movement.
And at this point I realise I've got very little chance at winning this game. As it doesn't matter (only first place matters in this tournament) I chat through a few options with Lewis but with his feat still in reserve I can get to his lines but I have very little chance at surviving his attacks for two turns. I try to assassinate via a couple of Boneshakers at Haley but the first didn't do much damage and the second one missed. The blood witches took down two of the storm lances though, with some good rolls. Erebus walked into the right zone, Deathjack towards the left with Mechanithralls gathered in-front to prevent a Stormwall charge (great time bomb target though Lewis noted).
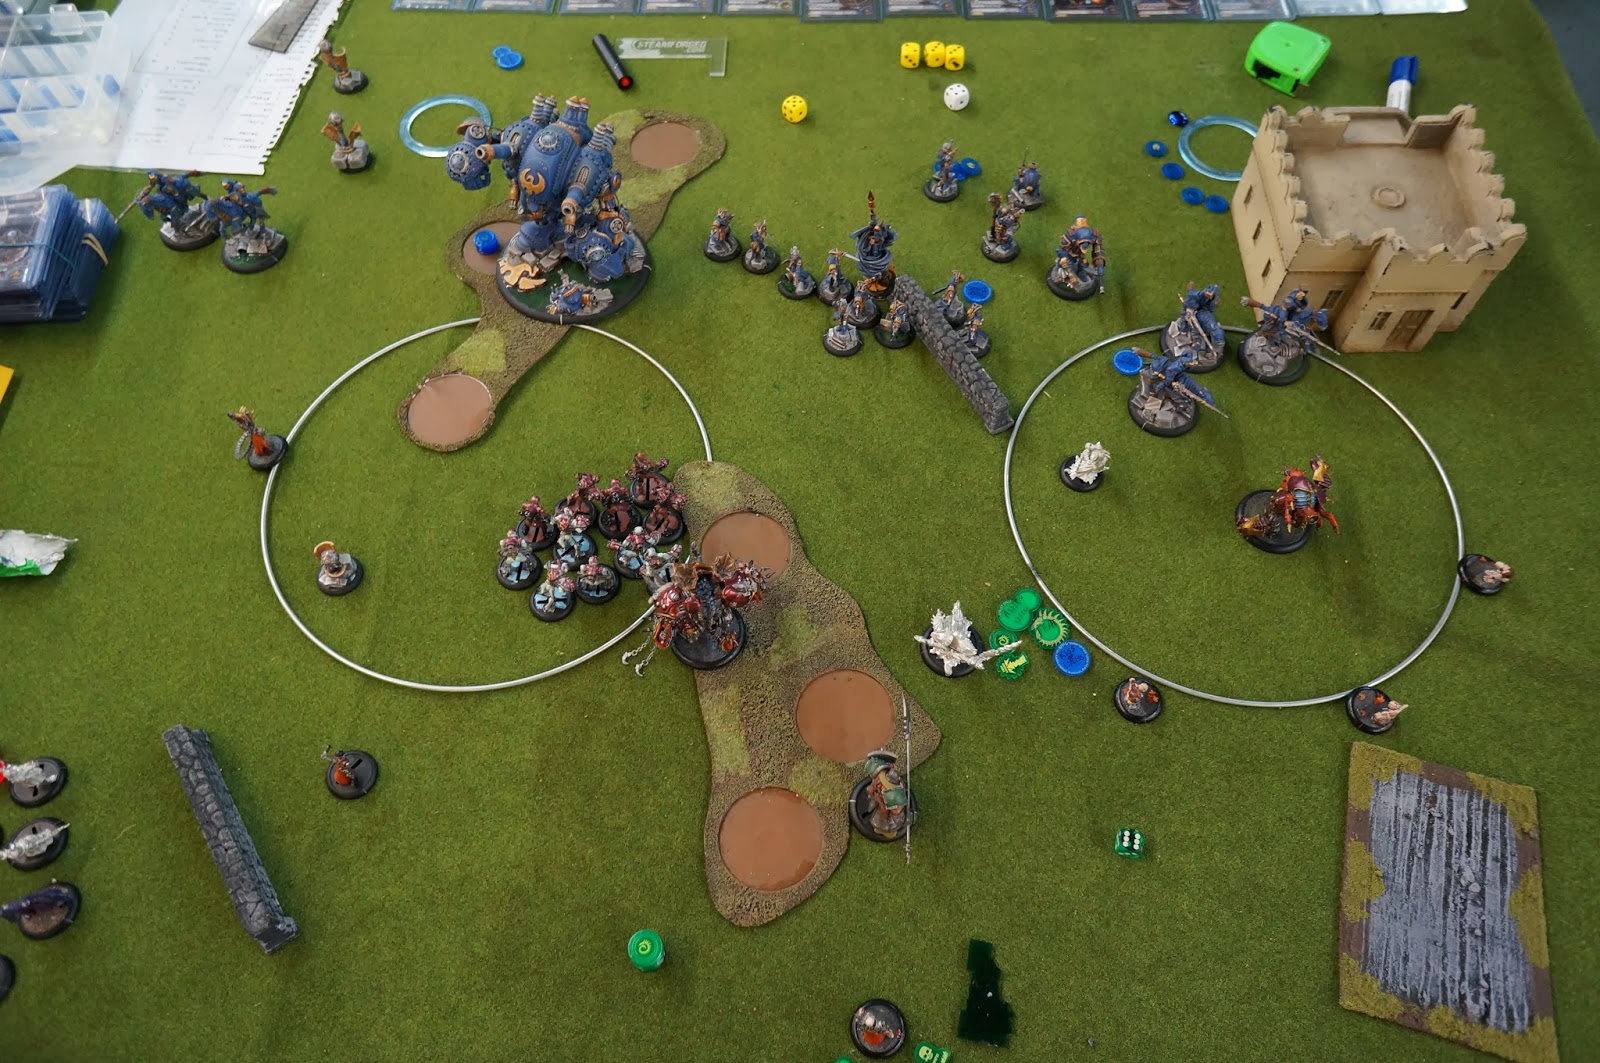
Lewis then goes and with Deadeyed gun mages he knocks Gaspy down so the hunter got an easy shot to end Gaspy.
Things learnt:
The game was very one sided, but that's what happens when you play against one of the best Cygnar players around. I do know that Lewis was worried about my Deneghra1 and Skarre1 lists, so I had that going for me.
Cygnar gun lines are some of the best at destroying Cryx infantry based lists. Lewis thinks that Deneghra2 would be best to combat this and I'll probably give her a go.
Overall it was a great weekend and I got to play against some of the best Warmachine players in the country. I came seventh when the results came in and against that crowd I was very happy. Hopefully I'll get the chance to go again next year but with my plans to play Skorne this coming year I don't know how successful that'll be.
Subscribe to:
Posts (Atom)